What is Groq?
- Groq (not Grok!) is a company that runs AI models super fast and specializes in inferencing.
- Inferencing is the process of using a trained AI model to generate predictions or responses based on new input data.
- Groq is a great way to experiment with AI chatbots because it offers a generous free tier and fast response times.
Create a Groq Account and API Key:
- Go to console.groq.com and sign up for a free account using your email, Google account, or GitHub account.
- Once logged in, find API Keys in the navigation menu.
- Click Create API Key, give it a name (like “cis335”), and click Submit.
- Groq will show you the key exactly once. Copy it and save it somewhere safe, such as a plain text file on your computer. If you lose it, you’ll need to generate a new one.
- Treat your API key like a password. Never share it publicly or post it in a place like GitHub, a public webpage, or a group chat. Anyone with your key can use your account and free usage limits.
In the Web-Based Version of VS Code, Create a New Python Azure Function:
-
In VS Code, ensure that the Azure Functions extension is installed. Then select the Azure Functions extension icon in the Activity bar.
-
Then in the WORKSPACE (Local) area, select Create Function Project…
- Select the folder that will contain your function project (e.g., azuredev-6fd5). Choose Python as the language. Select Python interpreter 3.12 as the virtual environment. Select the HTTP trigger template and name the function, Lastname_gX_sY_Chatbot. Then select Anonymous for the authorization level.
-
Replace the default template Python code in the file function_app.py with the below.
- The Chat Completions function, called on line 32 in the code block below provides a simple way to take text as input and use an LLM to generate an output. The below example is designed to interact with the Groq API to create a Serverless LLM Endpoint by responding to a message.
function_app.py
1import azure.functions as func
2import logging
3from groq import Groq
4import os
5
6app = func.FunctionApp(http_auth_level=func.AuthLevel.ANONYMOUS)
7
8@app.route(route="Lastname_gX_sY_Chatbot")
9def Lastname_gX_sY_Chatbot(req: func.HttpRequest) -> func.HttpResponse:
10    logging.info('Python HTTP trigger function processed a request.')
11
12    # Set your Groq API key here
13    api_key = os.environ.get("GROQ_API_KEY", "Paste the Groq API Key here")
14    os.environ["GROQ_API_KEY"] = api_key
15
16    # Create an instance of Groq
17    groq = Groq()
18
19    # Define the messages
20    messages = [
21        {"role": "system",
22         "content": "You are an expert in virtualization technology ",
23        },
24        {"role": "user",
25         "content": "In two sentences, describe serverless functions.",
26        }
27    ]
28
29    # Call the create function to generate a message
30    try:
31        completion = groq.chat.completions.create(
32            model = "openai/gpt-oss-20b",
33            messages = messages,
34            max_tokens = 300,
35            temperature = 1
36        )
37        response_message = completion.choices[0].message.content
38    except Exception as e:
39        response_message = str(e)
40
41    # Return the response
42 return func.HttpResponse(response_message, status_code=200)- Above, in lines 13 through 15, the API key is set as an environment variable. Environment variables can store information such as file paths, system settings, and passwords.
- In line 17, an instance of the ‘Groq’ class is created and stored in the variable ‘groq’.
- In lines 20-27, a list named, messages is defined, containing dictionaires that represent the prompt for the AI. Each dictionary specifies the roles (‘system’ or ‘user’) and the content of the message. The system’s role is to provide instructions, and the user’s role is to ask a question or make a statement.
- In lines 31-35, the groq.chat.completions.create function is called to generate a text completion from the Groq API. This function takes several arguments:
- model: Specifies the AI model to use, in this case, “openai/gpt-oss-20b”.
- messages: Passes the conversation context defined earlier.
- max_tokens: The maximum number of tokens (pieces of text) to generate. Set to 300 here.
- temperature: Controls the randomness of the output. A value of 0 means the output will be deterministic and based on the most likely response.
- Line 37: The generated text is extracted from the response object. The response object includes multiple fields, and choices is a Python list of possible completions. This script selects the first completion (choices[0]) and then accesses its message.content. The extracted text is then returned as a HttpResponse object on line 42.
-
Don’t forget to update the function name on lines 8 & 9 to match the name you used when creating the function!
-
Before deploying the app, make sure to list in the requirements.txt file the following Python modules: azure-functions and groq.
-
To deploy the app to Azure, choose the Azure icon in the Activity bar, then in the Workspace area, highlight over Local Project and click the Deploy to Azure icon (looks like a cloud with an up arrow).
-
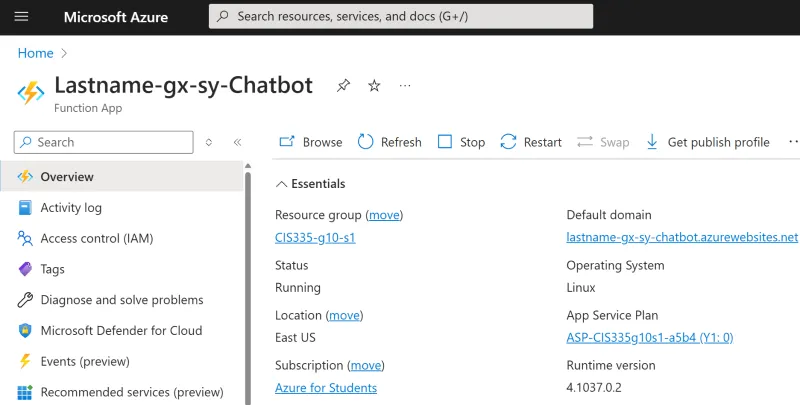
Choose the Function App you previously created, Lastname-gX-sY-Chatbot to deploy the function to Azure.
-
Navigate back to the Azure Portal, select the Function App, click the Functions tab, select the function trigger, select the option, Get function URL, then finally copy the Function URL.
-
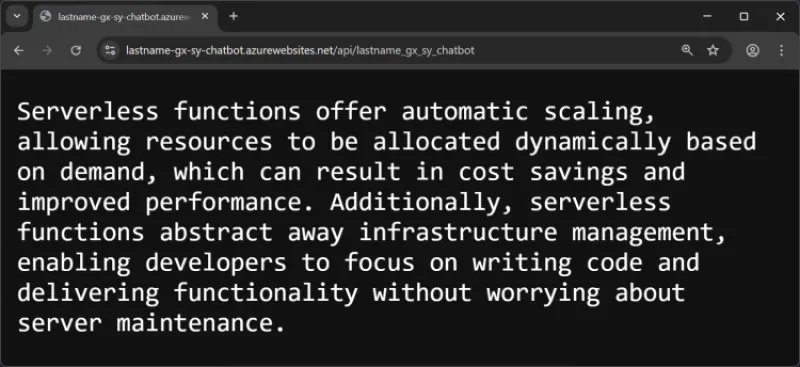
Finally, paste the URL into a web browser to display the generated text.
-
Submit the following two screenshots, including the Function App HTTP Response showing the generated text with the Azure Function URL included in the web browser.