Skip to content
- Log in to Springfield by FIRST connecting to either VCAT General 3.0 or COB 3.0
- Navigate to your group folder in the VMs and Templates tab
- Right click and choose ‘New Virtual Machine’
- Choose ‘Create a new virtual machine’, and click Next
- Name your VM using the format cis335-g#-s#-la1. (For example Student 3 in Group 4 would name the VM cis335-g4-s3-la1). Click Next
- Select your host/compute resource:
- Groups 1-2: maggie.wcu.edu
- Groups 3-5: milhouse.wcu.edu
- Group 6: ralph.wcu.edu
- Choose your Data location:
- Even Number Groups: Forsyth (For_Springfield_VMFS_L)
- Odd Number Groups: HHS (HHS_Springfield_VMFS_Z)
- Leave Compatibility as the default, and click Next.
- Select a Guest OS:
- Choose Linux for the family
- Choose Rocky Linux for the version
- Hardware:
- Set the number of CPUs to 1
- Set the memory to 4GB
- Set the hard disk size to 16GB
- Set Disk Provisioning to Thin Provision
- Network:
- Browse and choose your groups network. (E.g., COB Group 2 if you are in the second group)
- New CD/DVD Drive: Choose Datastore ISO File from the pop-up and pick the Rocky 9.1 ISO as pictured below.
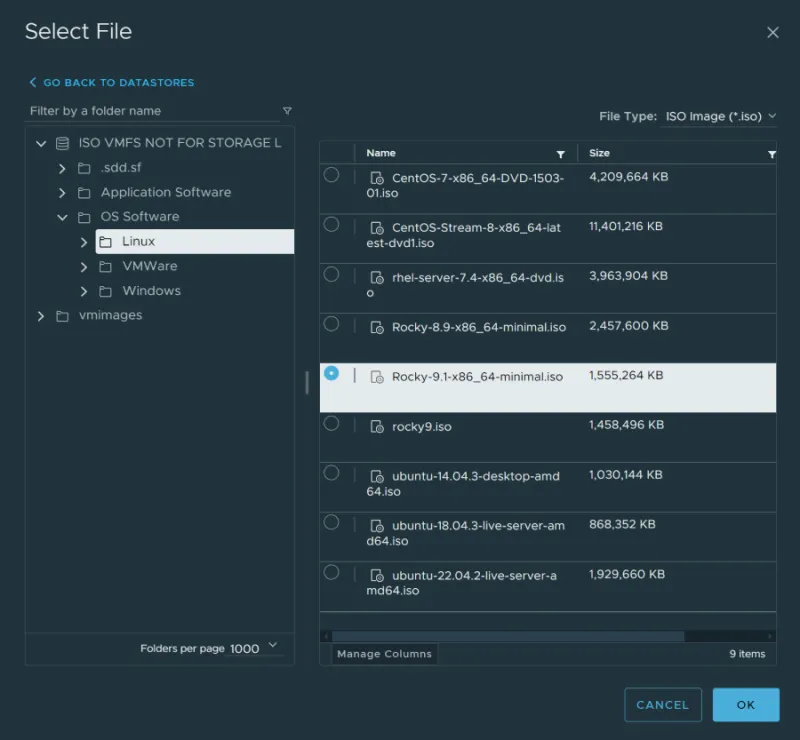
- Make sure the disk ‘Connect At Power On’ box is checked for both the network and ISO. Click Next.
- Confirm your specs are similar to those pictured below.
- REMEMBER TO TAKE A SCREENSHOT BEFORE HITTING FINISH!!!!
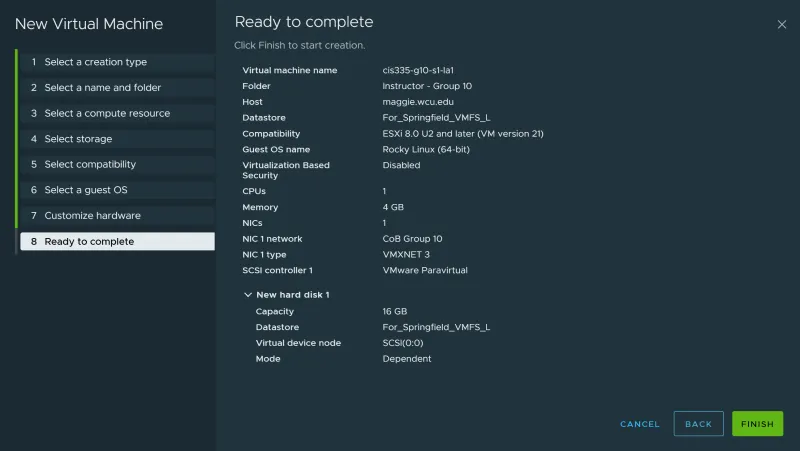
- For this part of the assignment, please submit a screenshot like the one shown above, but with your settings.
- If you need to make changes, click ‘Back’, otherwise click “Finish”.