- If you configured the CD/DVD correctly in Lab Activity 1A, when you power on your machine it will boot from the Rocky install DVD.
- Choose to install Rocky Linux.
- A graphical installer will launch.
- Once the graphical installer launches, choose your language and click ‘Continue’.
- You will need to configure the Installation Destination. Click that section, make sure your HD is checked and click Done in the top left corner.
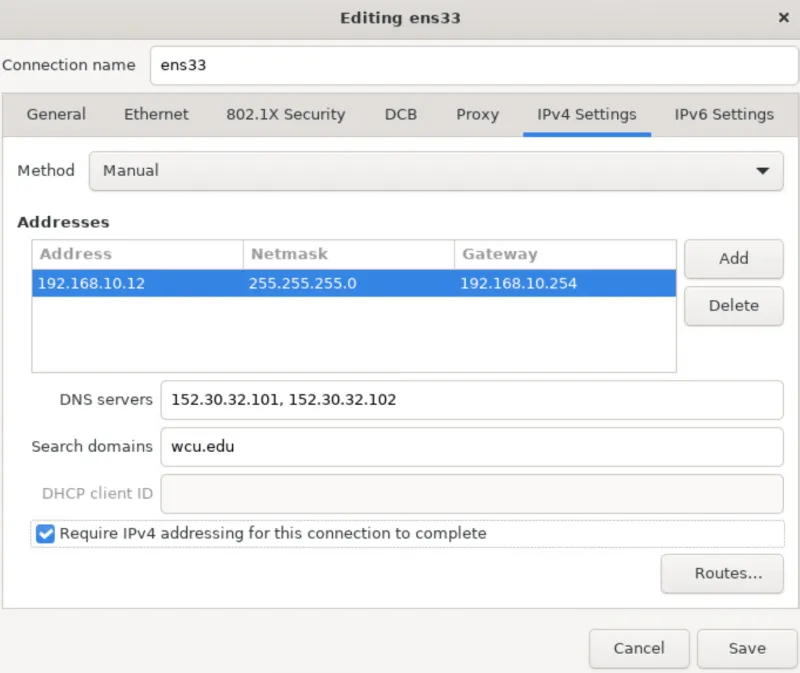
- Configure the Network & Host Name by clicking that section. You will manually configure IPv4 on the installed interface.
- Use the 3rd IP assigned to you. Remember, you start counting with 0. So, if you were student 3 in a group, your last octet would be .32. All IPs follow this form: 192.168.G#.S#x.
- Netmask: 255.255.255.0
- Gateway: 192.168.G#.254
- DNS Servers: 152.30.32.101 and 152.30.32.102
- Search Domains: wcu.edu
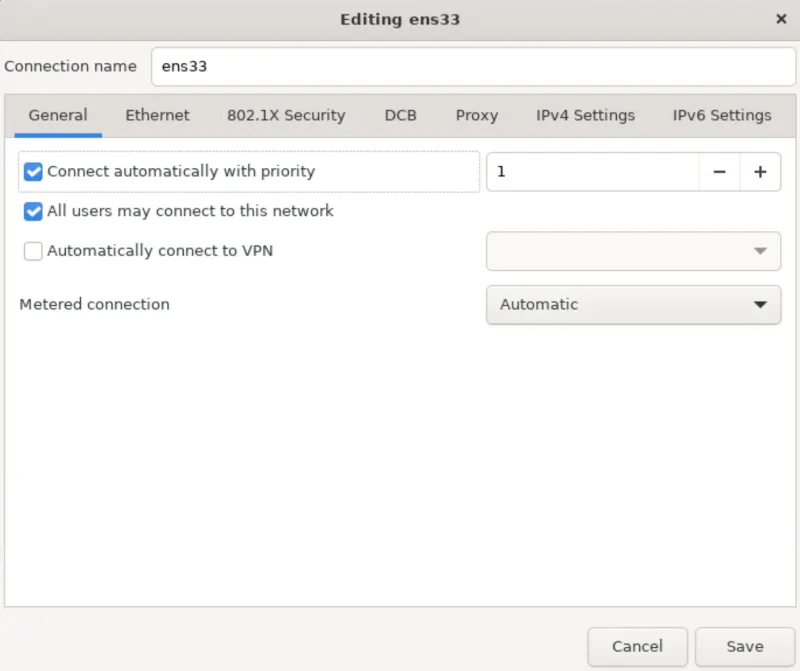
- The general tab should look similar to the below:
- Within the IPv6 Settings tab set the method to Disabled.
- The IPv4 Settings tab should look similar to the below, but with your settings:
- Once the network settings have been configured, click Save.
- Turn the interface on in the top right corner. Set the Host Name to the VM Name and click Apply.
- Click Done in the top left corner.
- Click Software Selection. Select the Standard option and click Done.
- Set a root password. For this assignment, I want everyone to set the root password to: CIS335wcu!@#$
- Ensure the option, Lock root account is unchecked.
- Check the option, Allow root SSH login with password! Click Done.
- Click Begin Installation.
- Once the system finishes installing the OS, click the reboot button.
- Once your system has rebooted, you should be at a login prompt. Type root as the username and the password you set above, CIS335wcu!@#$
- Notice that if you look at the summary of your VM, it will say that the VMware tools are not installed or running. You will need to install and start them. Run the following command to install the open-vm-tools software package:
1dnf install open-vm-tools
- Run this command to start the openvmtools service:
2systemctl start vmtoolsd
- Look back at the vSphere summary, you will see that the tools are now installed and running.
- Run the following command to update all installed software on the system:
3 dnf update -y && reboot
- This command will update all installed software and then reboot the system. You will need to log back in after the reboot.
- Look back at the vSphere summary for your system. Is it running? If you followed the steps above, it shouldn’t be. This is because even though we installed the software and started it, we did not enable the service to make it stay running after reboots. Software on a linux machine needs to be enabled so that it starts automatically after a reboot. Run the following commands to enable and start the open-vm-tools daemon.
4systemctl enable vmtoolsd
5systemctl start vmtoolsd